Combining two images into one sounds simple until you try to make the result look believable. The hard part is not placing both files on one canvas. The hard part is making lighting, scale, edges, and subject placement feel like they belong in the same scene.
That is where an AI Image Combiner can save time. Instead of manually cutting out a subject, adjusting shadows, and fixing seams, you describe the scene you want and let the model handle most of the composition work.
A good AI image combiner does more than stack two files together. It rebuilds them as one scene.
Start with the right kind of images
The quality of the final result depends heavily on the two source images you choose. AI can help with blending, but it still works best when the source material gives it something reasonable to build from.
Pick images that work together in these ways:
- The main subject is clearly visible.
- The crop is not too tight around the subject.
- Lighting is at least somewhat compatible.
- Camera angle does not fight the new scene.
- Important details like hands, hair, packaging, or edges are not heavily blurred.
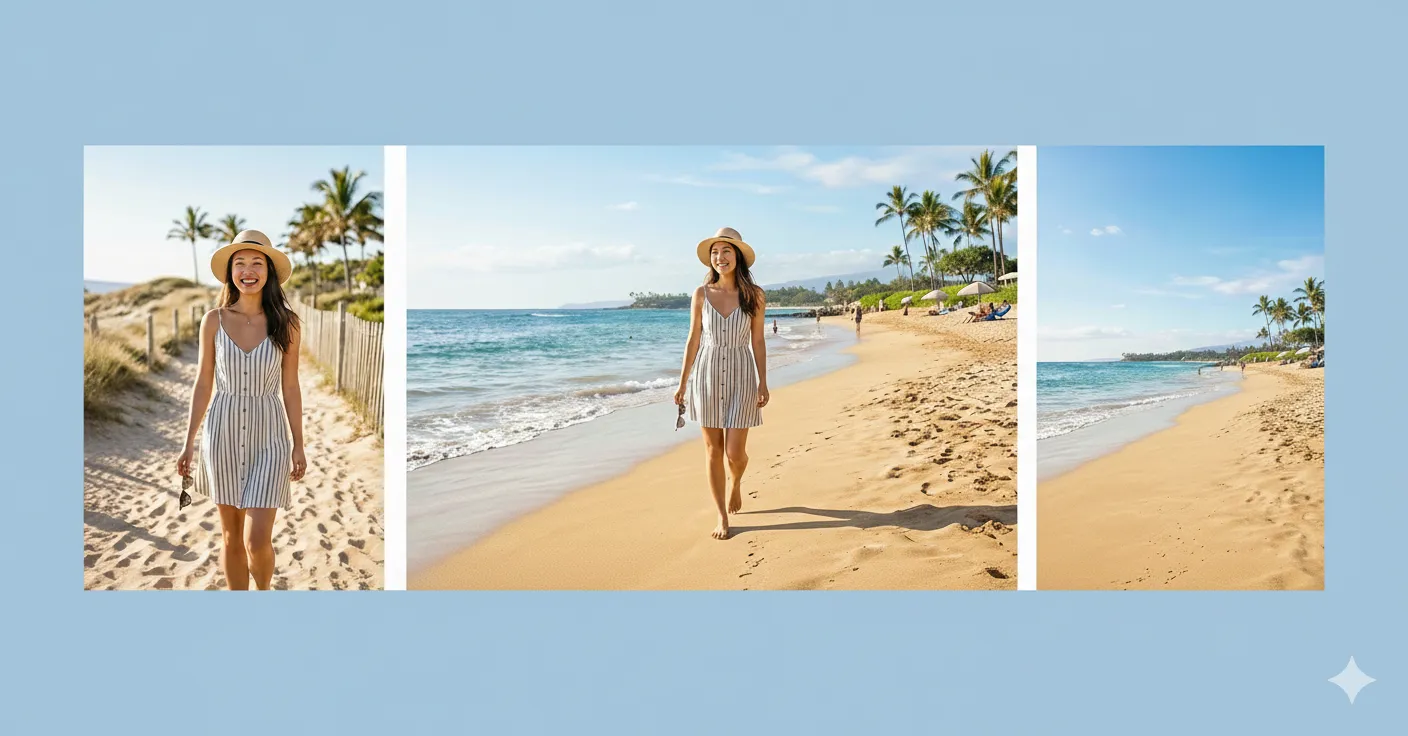
For example, if you want to place a person into a cafe scene, a daylight portrait taken from chest height will usually merge more naturally into another chest-height interior scene than into a dramatic overhead shot.
Decide whether you need photo merge or full image combining
Not every job needs the same workflow.
Use AI Photo Merge when:
- you only have two images
- the composition is simple
- you want a quick blended result
Use AI Image Combiner when:
- you want stronger prompt control
- the new scene needs to feel newly constructed
- you may use more than two visual sources
- placement and realism matter more than speed
If you are unsure, open Scene Design Tools first. It makes it easier to compare which workflow fits the job instead of forcing one tool to do everything.
Write prompts that describe the relationship between the images
The biggest reason AI composites look fake is not always the model. Often it is the prompt.
Weak prompt:
combine these two imagesUseful prompt:
Place the person from the first photo into the cafe interior from the second photo. Keep the person's pose natural, match the warm indoor lighting, and make the final result look like one realistic photo.Better prompts usually explain:
- which subject should stay
- which scene should become the background
- where the subject should appear
- what lighting or mood should match
- what must remain unchanged
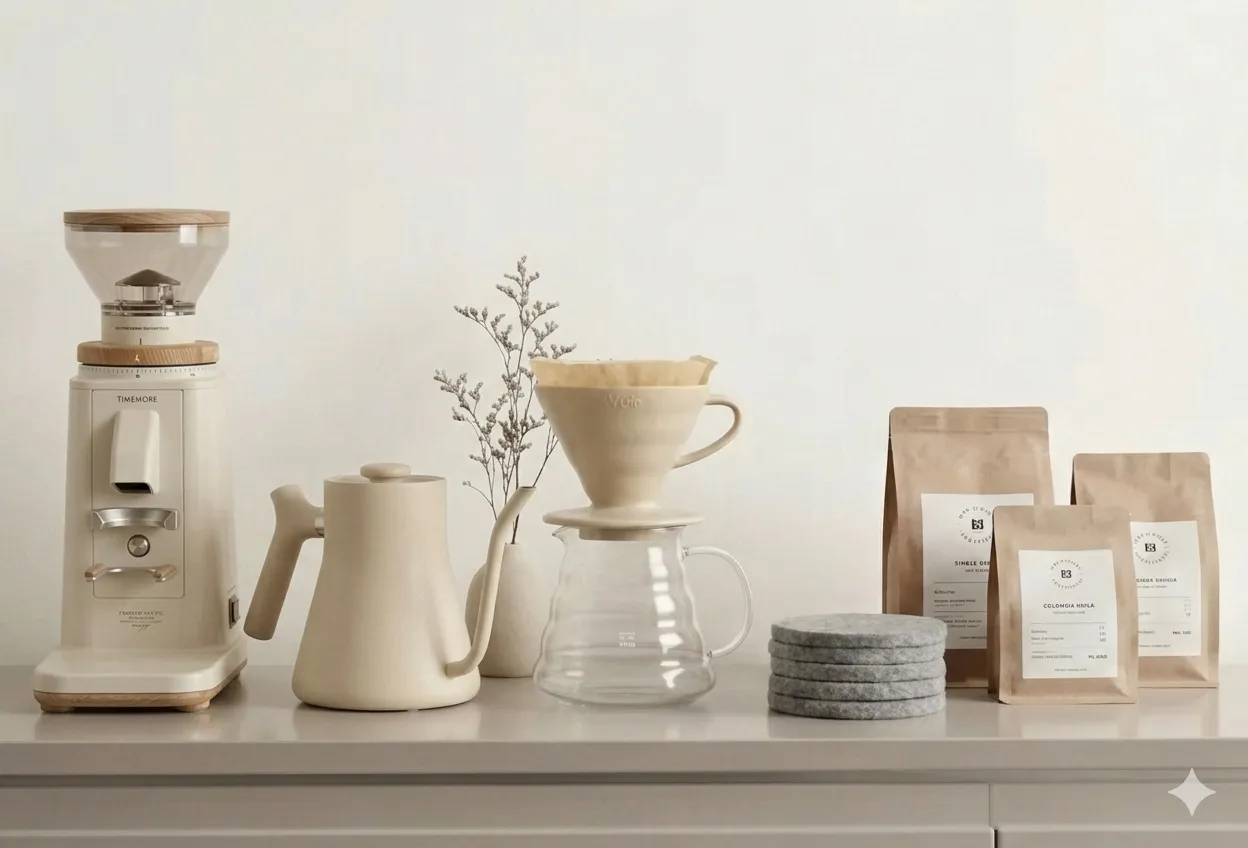
If you are combining a product shot with a lifestyle scene, say so directly:
Place the product from image one on the wooden table in image two. Preserve the product shape, label, and proportions. Match the soft daylight and keep the result suitable for an ecommerce listing.Review the result like a buyer, not like a prompt writer
Once the image is generated, do not just ask whether it looks impressive. Ask whether it would survive real use.
Check these areas first:
- hair and hand edges
- product corners and outlines
- shadow direction
- scale between the subject and the background
- reflections, labels, and small text
If the subject is technically present but feels pasted in, the merge is not finished yet. Rewrite the prompt to focus on realism, not style.
A usable result should hold up under a closer look, not just in thumbnail size.
Three prompt patterns that usually work well
1. Subject into scene
Use this when moving a person, object, or product into a new environment.
Place the subject from the first image into the second image. Match scale, lighting, and perspective. Keep the subject natural and avoid obvious cutout edges.2. Product into lifestyle shot
Use this for ecommerce, ads, and branded content.
Use the product from image one in the lifestyle scene from image two. Keep the product accurate, preserve branding, and make the scene feel realistic and commercially usable.3. Two scenes into one wider composition
Use this when you want a more creative or scenic result.
Blend both images into one wider composition with natural transitions, realistic depth, and consistent lighting. Avoid duplicated objects and unnatural seams.Common mistakes that make the result look fake
Mismatched perspective
If one image is shot from above and the other is straight-on, the model has to invent too much. That usually leads to awkward placement.
Vague prompts
If you do not explain what should stay, what should move, and what kind of realism you want, the output becomes harder to control.
Poor source quality
Blurry, low-resolution, or heavily compressed images make every edge problem worse. If your result is almost right but still soft, use AI Image Upscaler after the composition step.
Too little breathing room
Sometimes the merge works, but the final frame feels cramped. In that case, AI Image Extender is often the right next step because it gives the composition more space instead of forcing everything into a tight crop.
A practical workflow that works for most people
- Choose the cleanest two source images you have.
- Decide whether this is a quick merge or a true recomposition.
- Write a prompt that defines subject, scene, placement, and realism.
- Generate and review edges, scale, and lighting.
- Upscale or extend only after the composition works.
This order matters. If the composition is wrong, sharpening it will only make the problems more obvious.
Final thoughts
Combining two images into one with AI is most useful when you treat it like a composition task, not a magic button. Good source images, a clear prompt, and a quick realism check will do more for the result than any keyword trick.
If you want a flexible workflow with prompt control, start with AI Image Combiner. If your job is simpler and faster, AI Photo Merge may be enough. The important part is choosing the tool that matches the job, then judging the result by whether it actually looks usable.